From click to padlock: the keys, the certificate (the site's ID) that the browser checks, and HTTPS on your own machine.
Why this course
You type an https:// address and a padlock shows up. In between, your browser and the server opened a TLS (Transport Layer Security) connection, the protocol that protects the connection. HTTPS is HTTP, the language of web pages, wrapped in TLS: TLS makes the HTTP messages unreadable before sending them. We use it every day without knowing what goes on inside.
This course answers in one sentence. TLS makes three promises: keep your data secret, protect it from any change, and prove the server's identity. Every mechanism exists to keep one of them.
For once, this isn't a book but a video course, in English, published by Packt, a publisher of technical books and courses, and by SkillZone. The instructor is called Clyde. The course runs 43 lessons in three parts, 4 h 19 in total, on ExpertEdge, Packt's subscription site. First, HTTP seen through Wireshark, a tool that captures packets, the chunks of data crossing the network, and displays them. Then TLS theory, and finally hand-built HTTPS on your own machine. Packt also publishes seven written notes from the course in a public repository, an online folder of files.
The course touches only in passing on two topics. Client authentication: the server also asks the visitor for a certificate, a file that proves their identity. Revocation: cancelling a certificate before its end of validity.
The ideas that stick
To place the eight ideas, imagine you are visiting your bank, over https, in a crowded room. Each step points to the idea that explains it. The ideas are ordered by building block, from the simplest to the handshake that assembles them. This path follows time, hence the numbers out of order.
- Before you arrive, the bank got a stamped paper from a trusted authority: "this key really belongs to this bank" (idea 3).
- You run a line to it and say hello out loud. Each side puts only harmless things in it (idea 5).
- Each side builds the same secret at home, never sending it, like two painters swapping mixes (idea 2 and idea 5).
- An opaque partition closes: the room now sees only noise (idea 1).
- The bank shows its paper, and your browser checks the date, the stamp and the name (idea 4).
- Only then does your page request go out, sheltered.
Ideas 6 to 8 extend this path. Idea 6 settles the choice of key exchange against the quantum computer. Idea 7 reads an encrypted capture. Idea 8 repeats the same setup on your own machine.
The eight ideas fall into three groups:
- the building blocks of TLS (ideas 1 to 4).
- the connection as it opens in 2025 (ideas 5 and 6).
- TLS on your own machine (ideas 7 and 8).
1TLS doesn't stop anyone listening, it makes listening pointless
The course starts with a form sent by a browser, with the username "Wally" and the password "secret" (lesson 1). Wally Warthog is the instructor's alias (lesson 13). The wire is the network between the browser and the server. There, any machine passing by, a router or a Wi-Fi network for example, can copy the form. Clyde puts it bluntly: "TLS does not stop anyone intercepting data because once it's on the wire, it's free for all" (lesson 9).
So TLS doesn't hide what travels on the wire. TLS makes three promises about that content (lesson 9):
- confidentiality: whoever intercepts it reads only gibberish.
- integrity: nobody changed the message on the way.
- authenticity: you're talking to the server you meant to reach, not an attacker posing as it.
From here on, the attacker is whoever listens to or alters what travels on the wire.
Integrity rests on hashing: computing a fingerprint, a short summary of the message. The message travels with its fingerprint, and the receiver recomputes it to compare (lesson 15). Change one letter and the fingerprint changes completely (lesson 15). But "anyone can produce a digest" (lesson 15). An attacker who edits the message therefore sends a new fingerprint too, and the receiver notices nothing.
To thwart the attacker, the fingerprint has to depend on a secret value the attacker doesn't know. Without it, the attacker can't produce the right fingerprint (lessons 16 and 17). A key is such a secret value, a long string of digits. It has two uses. It goes into a fingerprint calculation. It also serves to encrypt, meaning to make a message unreadable, and to decrypt, meaning to make it readable again. That second use keeps things confidential.
2A slow key to agree, a fast key to talk
One problem remains: how do the browser and a stranger's server agree on a key, in front of the whole network? The course presents two families of encryption algorithms, meaning calculation methods, and TLS needs both (lesson 9):
- symmetric encryption: one key encrypts and decrypts. It's fast. The course names AES (Advanced Encryption Standard) as an example (lesson 7). Both sides must already hold the same key, though.
- asymmetric encryption: a key pair. The public key goes to everyone, and it encrypts. The private key stays with its owner, and only it decrypts. This encryption is "a lot slower than symmetric encryption" (lesson 9).
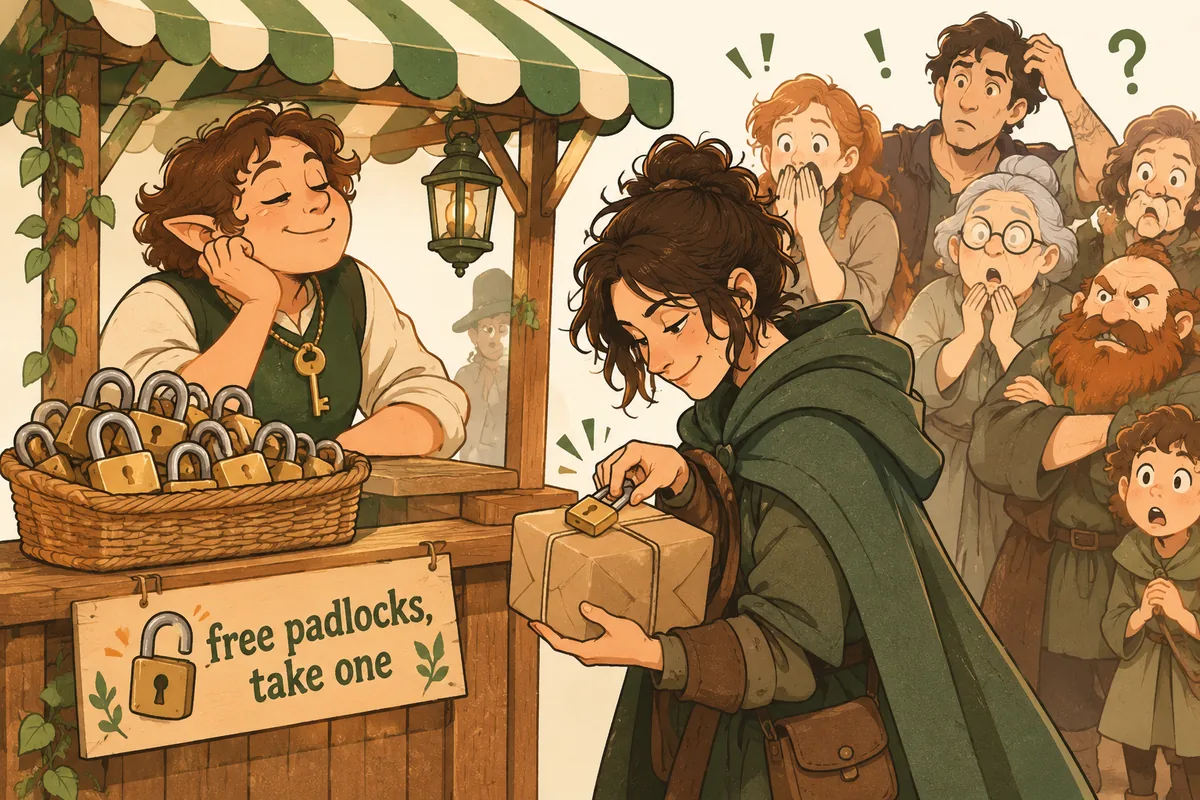
My picture, not the course's: the server hands out open padlocks, its public key. Anyone can snap one shut on a parcel, but only the server has the padlock's key, its private key. In the old method, RSA, the browser uses this at the start of the connection to send it a secret.
Figures the course doesn't give, measured by me: on a recent laptop (AMD processor, Go 1.26, median of 6 runs), one operation from each family. The right-hand column is a calculation: 1 MB cut into 190-byte blocks, the most RSA-2048 accepts at once.
| Operation | What it handles | Time per operation | For 1 MB |
|---|---|---|---|
| AES-256-GCM, encrypt (fast family) | 1 KB | 0.19 µs | 0.2 ms |
| RSA-2048, decrypt (slow family) | 190 bytes at most | 0.74 ms | over 4 s |
| X25519 (Diffie-Hellman), agree on a secret | no data | 33 µs | not applicable |
A key exchange encrypts no data: it only agrees on the secret (idea 5). For data, the gap is about 20,000 times in AES's favor. So TLS uses the slow family only once, at the start.
TLS combines them. At the start, the slow family gets both sides to agree on a shared secret. Each side then derives the same fast keys from it (lesson 12). After that, everything is symmetric (lessons 9 and 11). These fast keys are called session keys, because they live only as long as one connection (lesson 7).
There are several ways to agree on the shared secret (lesson 12). The course shows two: RSA, the old one, and Diffie-Hellman, the one in TLS 1.3. Idea 5 details both.
Each tool thus keeps a promise from idea 1. Symmetric encryption keeps all the traffic confidential. Hashing, with a secret, keeps integrity. Signing, covered next, keeps authenticity.
3Anyone can make keys, hence the certificate authority
The asymmetric pair can also sign. To sign, you reverse the pair's roles: the private key encrypts the text's fingerprint, and that result is the signature. The text travels with it. The receiver decrypts the signature with the public key, which gives the fingerprint back, and compares it with the one they compute themselves (lessons 13 and 16). Only the holder of the private key can produce a signature that matches. So it proves two things: the text hasn't changed, and it comes from that holder. It's not a secret, since anyone can decrypt with the public key, and that's intended.
That proof hits a snag. At the start of the connection, the server sends its public key to the browser (lesson 12). But "Anyone can generate public and private keys." (lesson 19). An attacker on the path can send their own while posing as piggybank.com, the fictional bank. The browser would then entrust its secrets to the attacker.
The fix is a third party the browser already knows: the certificate authority (CA). The server sends the CA a CSR (certificate signing request) with its public key and domain. The CA checks that the server controls that domain, for instance by having it place a file that the CA then fetches (lesson 20). Then the CA signs. The result is the certificate: a public file saying "this key belongs to this domain", signed by the CA.
The course doesn't mention Let's Encrypt, but it's the most common example of the CA in the figure: a free, automated CA run by a nonprofit, the ISRG (Internet Security Research Group). The file proof at step ③ is called the HTTP-01 challenge: the server's software puts a file under /.well-known/acme-challenge/ and the CA comes to read it, over port 80 only (the one for HTTP without encryption). The other common challenge, DNS-01, goes through a record in the domain's DNS zone. Its certificates last 90 days, so they are renewed automatically.
A Let's Encrypt certificate is not self-signed: the CA signs it, as in step ④. A self-signed certificate that isn't in the store also encrypts the connection, but it authenticates nobody: a pirate can present one too. Sources: letsencrypt.org, the "How it works", "Challenge Types" and "FAQ" pages.
The browser trusts the CA because the CA's public key is already on your machine. OS and browser ship with a list of trusted CAs, the trust store (lesson 21). A few CAs can't manage every certificate in the world. So they delegate to intermediates, like a CEO to managers (lesson 21). A site's certificate is thus signed by an intermediate, whose certificate is signed by a root, a CA at the top that depends on no other. That sequence of site, intermediate, root is called the chain of trust.
A root signs its own certificate: it is called self-signed. It isn't taken on faith, because it is already in your system's trust store. On google.com's certificate, the root "GTS Root R1" signed itself, and Windows already has it (lesson 29). GTS stands for Google Trust Services (outside the course, to be checked on pki.goog).
To keep the two moments apart, here is what happens before any visit, then at each visit.
Before, just once (then at each renewal of the certificate):
- The server makes its long-lived key pair and proves to the CA that it controls the domain, as in the figure at the start of the idea.
- The CA signs, with its private key, the certificate's fingerprint: the domain and the server's public key. That signature is the certificate, which the server keeps.
- The browser, for its part, ships with the root CAs' certificates. It has nothing else to download.
At each visit:
- The browser makes a key pair specific to this connection. It is used only to compute the shared secret (idea 5).
- The server sends it its certificate, along with the intermediates' certificates.
- The browser walks up the chain: it checks each signature with the public key of the link above, until it reaches a root it already knows.
- Only then does the page request go out, encrypted with the session keys.
5In TLS 1.3, everything after the first two messages is encrypted
First, the film of a connection, in order. To picture it, think of two people who want to talk quietly in a crowded room. TLS opens before HTTP and doesn't go through it.
- TCP, the way two machines open a reliable line between them, comes first. It's a bare pipe, with no encryption and no HTTP: anything said in it can be heard across the room.
- The first two TLS messages go out in the open, like postcards anyone can read. So they carry only harmless things, the public parts.
- Each side computes the same secret at home, without sending it. That's the painters' game, a little further down.
- From then on, everything is encrypted with keys drawn from that secret. The conversation goes on behind an opaque partition: the room sees people talking and hears only noise.
- The HTTP requests go out only now, inside the encrypted tunnel. HTTPS is HTTP set inside a TLS tunnel.
What's left is to see in what order keys, signature and certificate meet during the handshake. In TLS 1.3, the current version, it starts with two plaintext messages, meaning unencrypted ones (lessons 23 and 24):
- ClientHello (the client's "hello"): the browser lists its TLS versions, its cipher suites (the combinations of methods it accepts) and a randomly drawn number. That number will help build this connection's keys (lesson 12). It attaches a key-exchange public key, in a field named
key_share. - ServerHello (the server's "hello"): the server picks a suite and returns its own randomly drawn number and key-exchange public key.
With those two public keys, each side computes the same shared secret without sending it. That's Diffie-Hellman. Each side made its own key pair for this connection (lesson 26): its public key goes into the Hello, its private key stays home. Each side mixes its private key with the other's public key, and both land on the same result.
My picture, not the course's: two painters start from the same public color. Each mixes in a secret color, their private key, then they swap their mixes, their public keys. Each then adds their secret color to the other's mix. Both end up with the same shade. An attacker who saw the mixes can't separate the colors to recreate it.
This shared secret plays the role announced in idea 2. Each side derives the same session keys from it, and everything after the ServerHello is encrypted with them (lessons 12 and 26). On a Wikipedia capture, Clyde notes: "everything after this point is encrypted, we cannot read this" (lesson 24).
The server then sends its certificate, which already travels encrypted, behind the partition. Since the certificate is public, anyone can present it: the server must also prove it holds the private key. In TLS 1.3, outside the course, a signature does the job (see the box in idea 4). Each side finally sends a Finished message ("done"), encrypted with the session keys it has just built. If the other side can read it, both sides have the same keys (lesson 27). Then the HTTP requests go out.
Before TLS 1.3, TLS 1.2 did it differently: Diffie-Hellman "replaces" RSA (Rivest-Shamir-Adleman) (lessons 12 and 24). The client draws a random secret, encrypts it with the server's public key and sends it. It is a parcel closed with one of the open padlocks from idea 2. Only the server opens it, with its private key. Both sides then mix that secret with the two randomly drawn numbers to get the session keys (lesson 12). The proof of identity then comes for free: a fake server cannot open the parcel, so it cannot go on (lesson 27).
Outside the course, based on RFC 8446, §2 and §4.4.4. In TLS 1.3, Finished is an HMAC (Hash-based Message Authentication Code, lesson 17), a fingerprint computed with a secret key, over the whole handshake. Both sides recompute and compare: if the two fingerprints match, nobody tampered with the exchange.
The course's google.com captures come from HTTP/3, which runs on QUIC, built on UDP, instead of TCP (two ways of sending packets). The TLS handshake stays the same there (lessons 7 and 23). That matters for idea 7, where the HTML stays unreadable.
One detail is confusing: the ClientHello says "TLS 1.2". That's a concession to old firewalls, network filters that returned errors without that value. The real version sits in an extra field, the supported_versions extension (lesson 24).
6The browser offers two key shares, and the big one resists quantum computers
The key_share field from idea 5 used to carry a 32-byte key, and it has grown: here is why. A powerful enough quantum computer, a machine that solves calculations out of reach of today's machines, could break today's key exchanges (lessons 25 and 26). NIST (National Institute of Standards and Technology), the US standards agency, therefore published new algorithms. Clyde dates that publication: "NIST only produced its final set of post-quantum cryptography standards in August 2024" (lesson 26). Adoption by browsers stays fuzzy: "it's hard to say exactly when, late 2023 or sometime in 2024" (lesson 26).
Browsers don't bet everything on the new method: they wear belt and braces. They offer a hybrid exchange that stacks two methods. X25519 is the Diffie-Hellman of idea 5, the two painters, computed on an elliptic curve, a mathematical curve that allows short keys. It is well tested, but a quantum computer could break it. ML-KEM is NIST's post-quantum method, much more recent. Stacking both makes the exchange very hard to break (lesson 26). Outside the course, according to the IETF draft cited below (§2.1): it stays safe as long as one of the two methods holds.
ML-KEM doesn't work like the painters. KEM stands for Key Encapsulation Mechanism: think of a parcel. The client sends an open padlock, its ML-KEM public key. The server invents a secret, locks it in a parcel closed with that padlock and sends it back. Only the client has the key, so only the client opens it.
The client lists the methods it knows in the supported_groups extension. Each method has a group number. Group 4588 designates the X25519 plus ML-KEM combination (lesson 26). In google.com's ClientHello, Wireshark shows two key_share entries. The first is 1216 bytes: it's the hybrid, the two keys laid end to end (lessons 24 and 26). The second, 32 bytes, is plain X25519, a fallback if the server doesn't know the hybrid. Google picks the hybrid, so "the second key share, it's actually not used by the server" (lesson 26).
The server then builds the shared secret in two parts (lesson 26). For the first, it creates its X25519 pair and combines it with the client's X25519 half, as in idea 5. For the second, it applies encapsulation to the client's ML-KEM public key. It locks a secret in a parcel: that produces the second part and an encrypted blob. It sends back its X25519 public key and that blob, in its key_share. The client redoes the first part, opens the blob with its ML-KEM private key and gets the second. Both sides now hold the same two parts, which together form the shared secret. The course doesn't say how they are joined.
Outside the course, based on the IETF draft draft-ietf-tls-ecdhe-mlkem-05, the IETF being the body that writes Internet standards, and the crypto/tls docs. Group 4588 is called X25519MLKEM768, and "768" means the ML-KEM-768 variant. Its 1216 bytes are 1184 for ML-KEM, then 32 for X25519. The course puts X25519 first (lesson 26), but the draft says the opposite. The shared secret is the two parts laid end to end, ML-KEM first, 64 bytes in all (§4.3). In Go, crypto/tls enables this exchange by default since Go 1.24, as long as Config.CurvePreferences is left empty.
7An environment variable gives Wireshark the keys to read the capture
Clyde reads those 1216 bytes in Wireshark. This tool is free (lesson 2). It captures the packets crossing your network card. Over HTTPS, it sees only gibberish after the ServerHello: closed chests filing past. The browser, though, keeps the session keys in memory, the keys to those chests. The trick: ask it to write them to a file (lesson 7). That file is a photocopy of the keys, handed to Wireshark.
First you create an environment variable SSLKEYLOGFILE, a named setting that programs read at startup and that here names a text file. SSL is the old name of TLS, left in the name (lesson 24). Clyde insists on the spelling: "You have to write it just like that" (lesson 7). Then you point Wireshark's preferences at that file (Edit, Preferences, Protocols, TLS).
First attempt: Clyde forgot to restart the browser, and the file stays empty. He closes the browser, reopens it and goes back to google.com: this time the keys get written (lesson 7). The capture now shows the "200 OK" and headers in clear. The HTML, though, stays unreadable: over HTTP/3 the data stays encrypted despite the key file, which puzzles Clyde (lesson 7).
# made-up example, not from the course (which does it on Windows)
export SSLKEYLOGFILE="$HOME/tls-keys.log"
firefox &    # started after the variable, or the file stays empty
Clyde warns: "that is quite dangerous if someone gets hold of those session keys" (lesson 27). With the file and a capture, anyone can reopen every chest, including yesterday's: past conversations can be replayed. My advice, not the course's: remove the variable when you're done.
Outside the course, based on the crypto/tls docs. In Go, the KeyLogWriter field of tls.Config writes the same file. The docs warn it compromises security and is for debugging only.
8On localhost, you become your own certificate authority
The course's last part sets up HTTPS on your own machine, named localhost, and Wireshark proves the result. Imagine you create your own authority, the CA: it hands you a stamped paper for your machine, and you tell your computer to trust that authority. No public CA will sign for localhost: a CA checks that you control the domain, as in idea 3, and nobody else can see your machine (lesson 21). Until your home-made CA is in the trust store, Chrome shows "Your connection is not private" (lesson 32). So the course rebuilds idea 3's chain of trust in miniature, with XCA, a free certificate-management tool (lessons 29 to 32):
- Create the CA "Wally Warthog Root CA": a 2048-bit RSA key and a ten-year certificate signed by itself (lesson 30).
- Create the server's key and CSR for
localhost. The SAN field (subject alternative name, the names and addresses covered) getslocalhostand127.0.0.1(lesson 31). - Sign the CSR with the CA, for 365 days (lesson 31).
- Hand the certificate and private key to Live Server, a VS Code extension, on port 4430 (lesson 32). That port is 443, the usual HTTPS port, with a zero added for the local test.
- Import the CA certificate into the Windows trust store: your computer now trusts that authority, and the warning goes away (lesson 32).
Wireshark confirms: TLS 1.3, a 1013-byte certificate, visible thanks to the key file, issued by "Wally Warthog Root CA", and the HTML readable once decrypted (lesson 33). The values 2048 bits, ten years and 365 days are choices for a local test. The course then redoes the recipe with OpenSSL, then with Node and the npm package mkcert. OpenSSL is a command-line toolbox.
Outside the course, to be checked. A home-made root CA can sign for any domain, and your machine will believe it. Keep its private key out of every code repository. Filippo Valsorda's mkcert tool, not the npm package, does steps 1, 2, 3 and 5 in two commands: mkcert -install, then mkcert localhost 127.0.0.1. Step 4 stays manual. The course first stresses the "common name", the certificate's main name (lesson 30), then XCA copies it into the SAN (lesson 31). Chrome, though, has only read the SAN since 2017, so the main name alone would no longer be enough.
My honest take
Can you understand what happens between the click and the padlock? Yes, and that is the best part of this course. Clyde opens real packets: Google's ClientHello, the 1216-byte key, the certificate you only see with the key file. You see TLS instead of taking it on faith.
He calls you "my dear student" eighteen times and promises to make you an HTTPS "grandmaster". You come out a good student, with two caveats. In places the course dates from TLS 1.2: lesson 27, built on RSA, is to be taken as history. And it skims over client authentication (lesson 28) and revoking a stolen certificate (lesson 30).
My advice: the theory without lesson 27, then lesson 7 and lessons 29 to 33. The rest only helps if you write Node on Windows.
Odilon
Still valid in 2026?
The three promises, the two key families, the role of CAs and the principle of the hybrid exchange all hold. One passage needs correcting, and two points need nuance or additions:
- Lesson 27. The client encrypts a "premaster secret" with the server's RSA key. That premaster is TLS 1.2's randomly drawn shared secret. Both sides derive their session keys from it. That's TLS 1.2. RFC 8446 (§1.2) removes that exchange. In 1.3 the secret comes from the Diffie-Hellman in idea 5.
- Lesson 20. The course says the CA "encrypts" the fingerprint with its private key. That picture comes from RSA. With ECDSA (Elliptic Curve Digital Signature Algorithm, a signature on an elliptic curve), common today, the vocabulary is signing and verifying.
- The missing pieces. The course never mentions OCSP, Let's Encrypt or Certificate Transparency. OCSP is a service that says live whether a certificate is revoked (RFC 6960). Let's Encrypt is a free, automated CA (letsencrypt.org/about). Certificate Transparency publishes public logs of the certificates issued by CAs (RFC 9162, experimental, which replaces RFC 6962). These glosses are outside the course, each with its source.
Who is it for?
Read it if
- you use HTTPS daily without knowing what the padlock checks.
- you want to read a ClientHello in Wireshark.
- you want warning-free HTTPS on localhost, on Windows, with VS Code or Node.
- you want to place TLS 1.3 and post-quantum key exchange before an interview.
Skip it if
- you need to set up client authentication (mTLS, mutual TLS) or revocation.
- you already read RFC 8446 comfortably.
- you can't stand an instructor who says everything three times.
This video course is part of ExpertEdge, Packt's subscription for technical books and video courses. The code ODILON50 takes 50% off the yearly plan: the course on ExpertEdge. Affiliate link: I earn a commission if you subscribe with this code, and my ratings don't depend on it.
Going further
- The lesson HTTPS: opening a secure channel: the handshake step by step.
- The High Performance Browser Networking note, by Ilya Grigorik: what TLS costs, and OCSP stapling (OCSP is glossed in "Still valid in 2026?").
- The Defending APIs note, by Colin Domoney: mTLS between two services.
- The Web Application Security note, by Andrew Hoffman, and the Computer Networks note, by Peterson and Davie.
- The Developer's Great Book, chapter 5, on networking.
- On the blog, what the course leaves out: multi-audience mTLS, CRL revocation, .p12 files on Windows.
- Packt's public repository, MIT-licensed: the course's seven notes.
Note based on: a 4 h 19 video course in 43 lessons, apart from the "My reading" boxes, which are mine. Source: lessons 7, 9, 11 to 13, 15 to 17 and 19 to 33 in detail. The repository's seven notes are read too, with quoted passages of lessons 1 and 2 checked.
Comments (0)